Tutorial - How to Edit RAW Photographs
Why you should be editing photos in RAW? If you have camera, it’s simply a question as to whether you decide on final effect, or camera does it!
If you have Canon, Nikon or Sony camera, or… I would advise to take them in RAW format because the real magic happens while pulling out the best colour and light information from the picture!
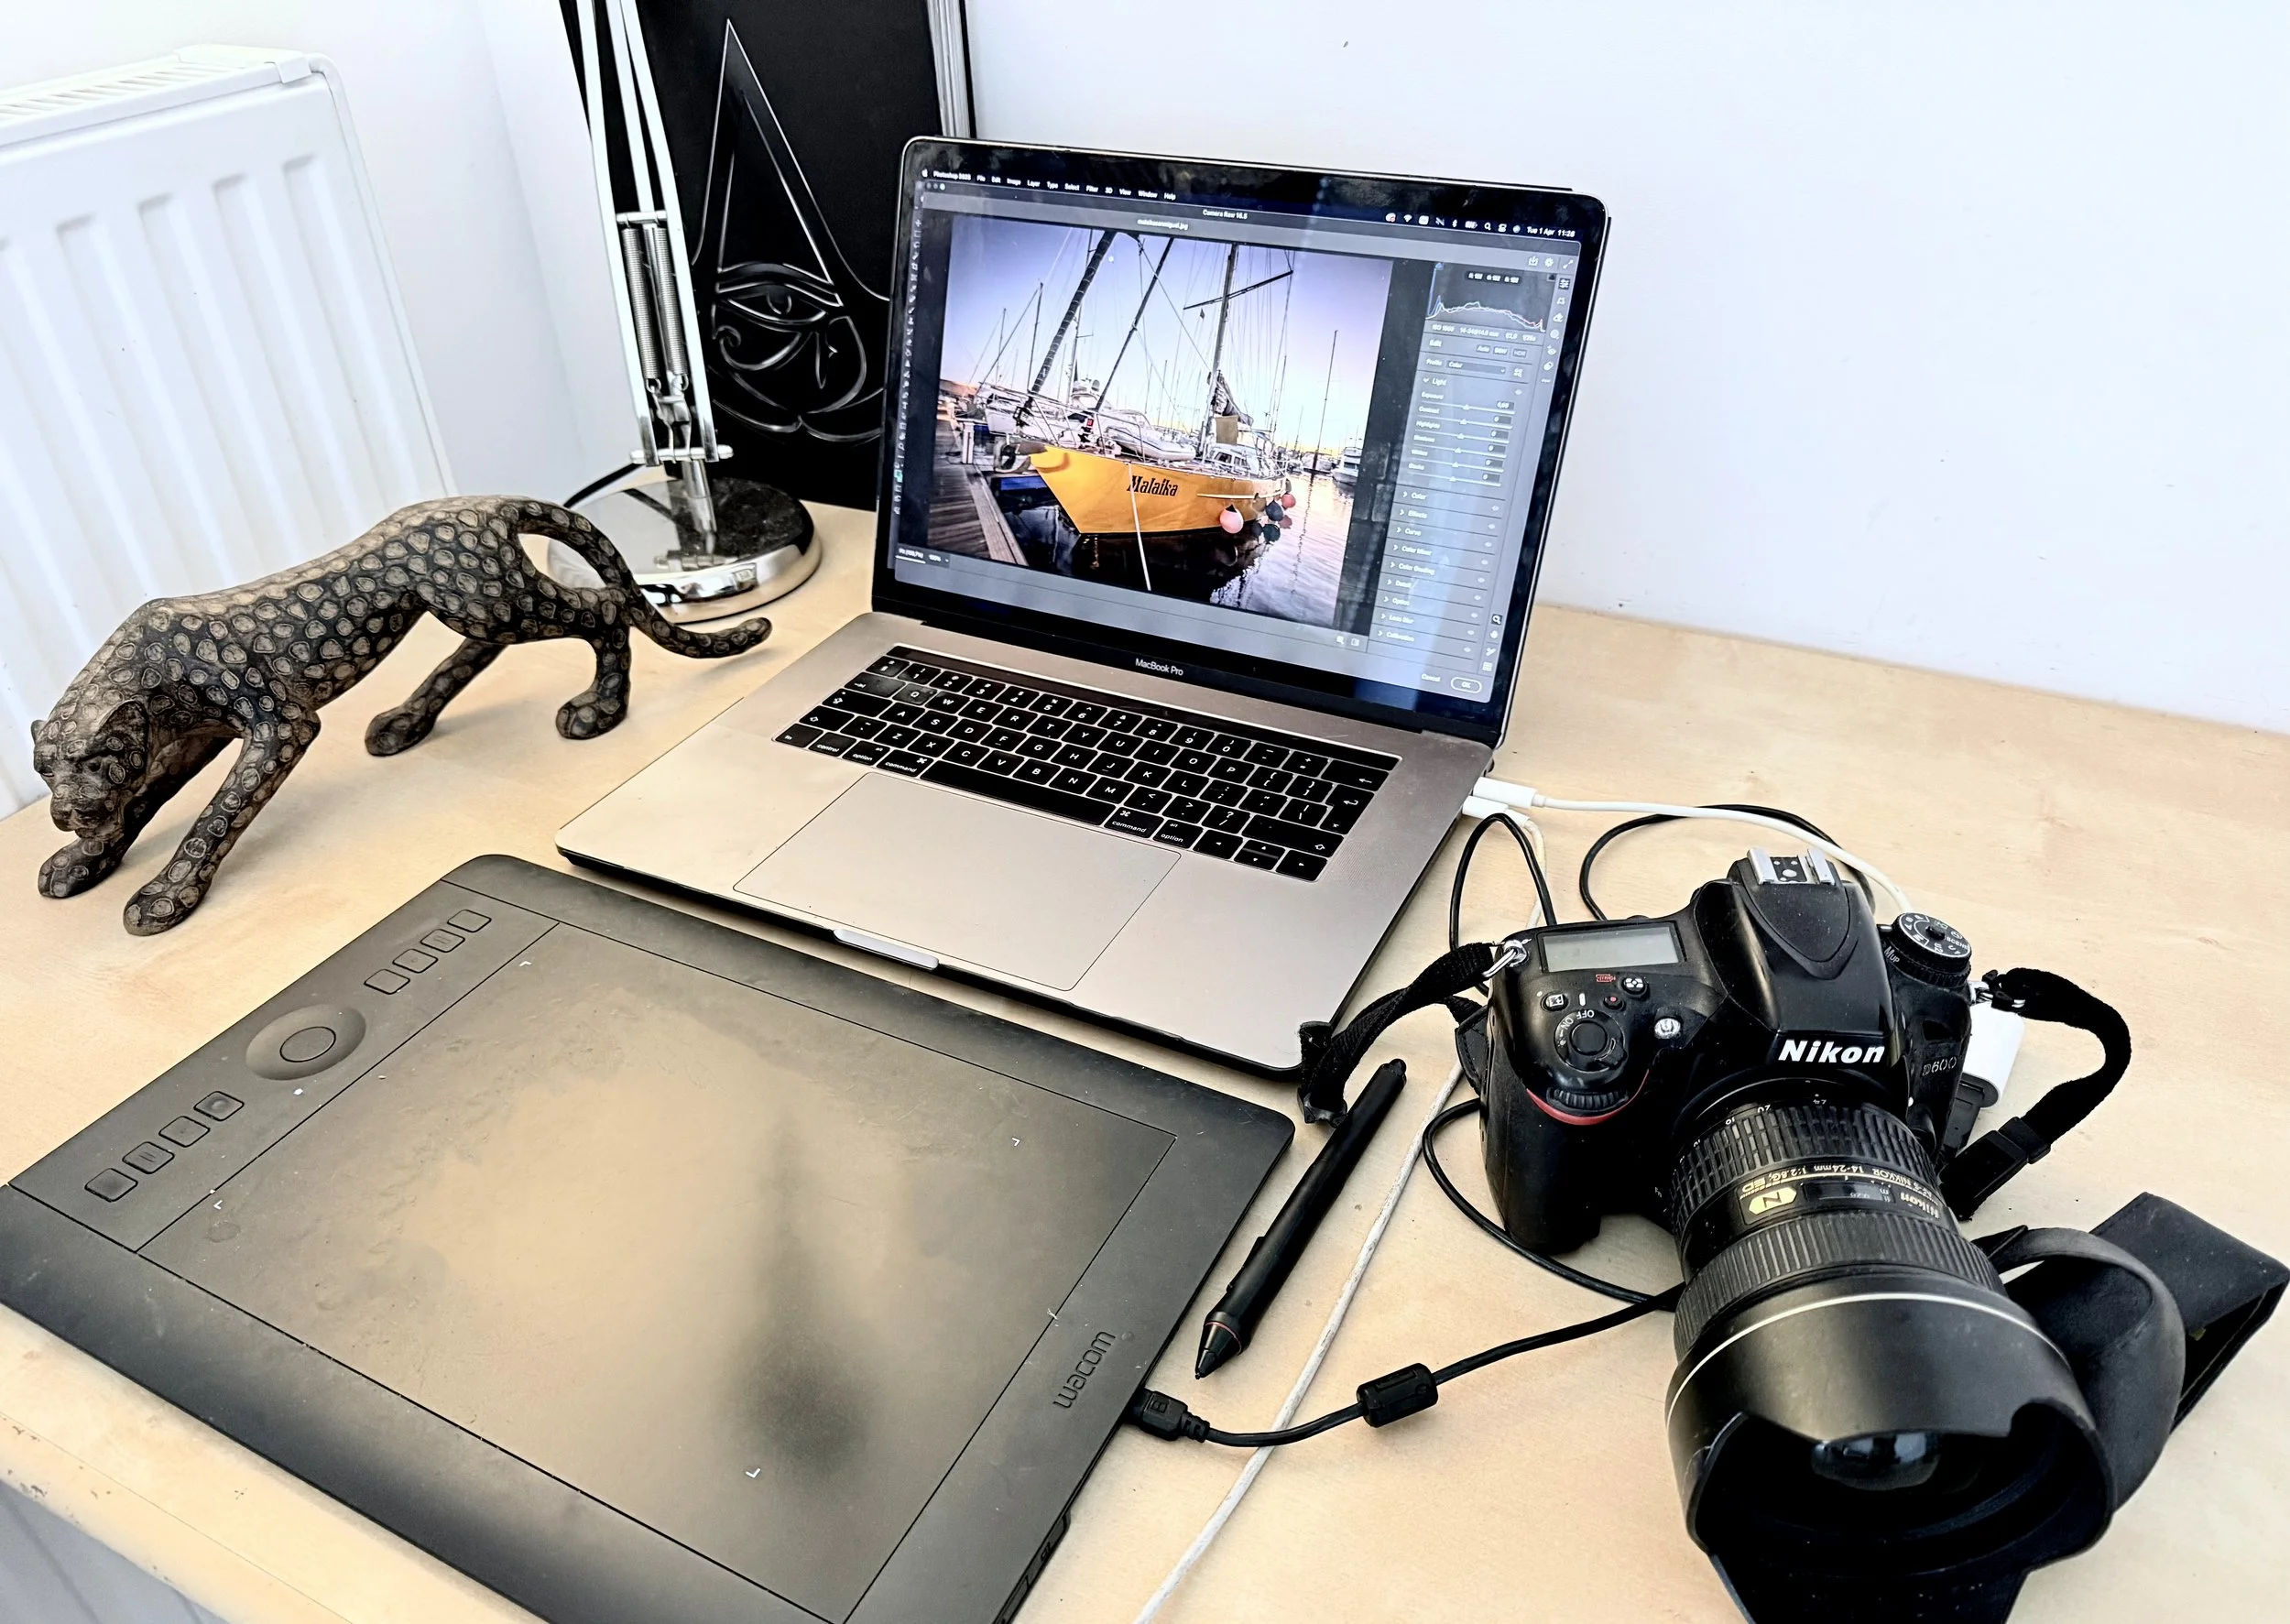
It’s so much fun to work on RAWs. You will need Lightroom or Photoshop application to play.
For this tutorial I used Photoshop. The tutorial is quite a simple one, but already makes significant difference. Just to introduce what difference makes when you haven’t thought working on RAW but kept importing the JPG only.
STEP 1
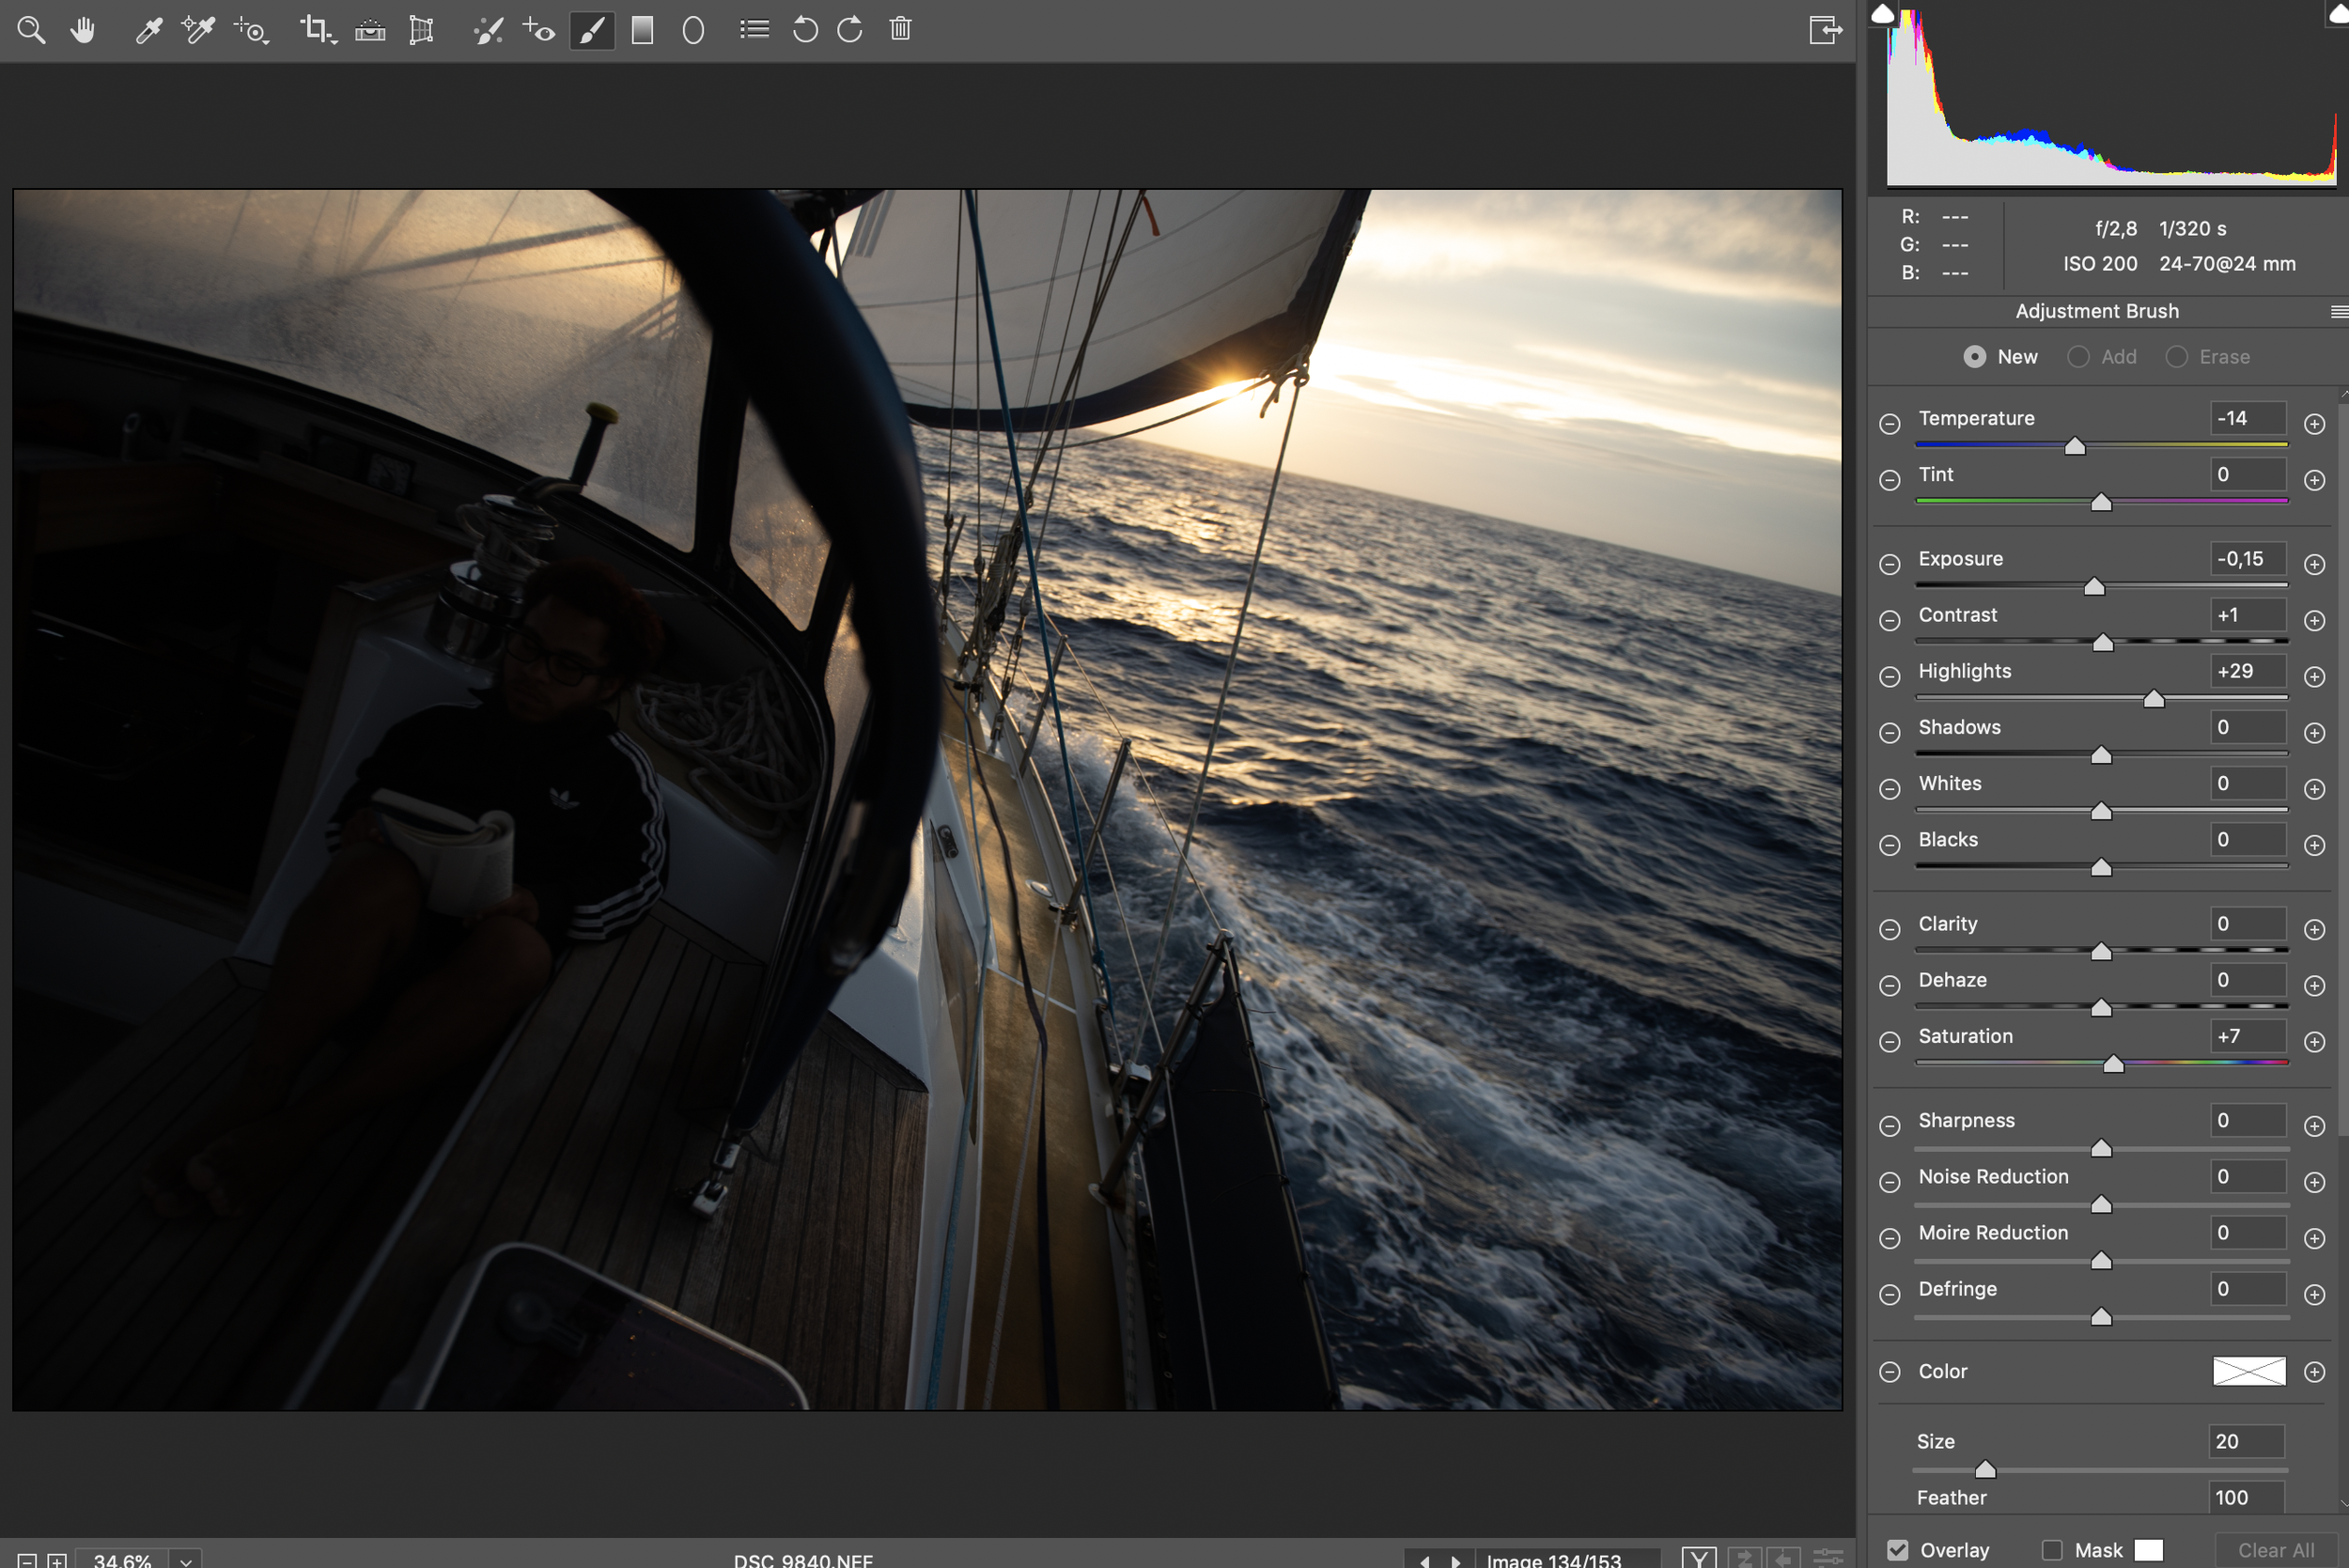
That’s a fresh picture. If you were saving in JPG format, that’s how would look like. Dark, without depth and… nothing to look at, right?
But luckily I saved this picture in RAW (Nikon has NEF) so after opening the file in Photoshop, automatically we are in program where we have tools to control colour and depth information.
STEP 2
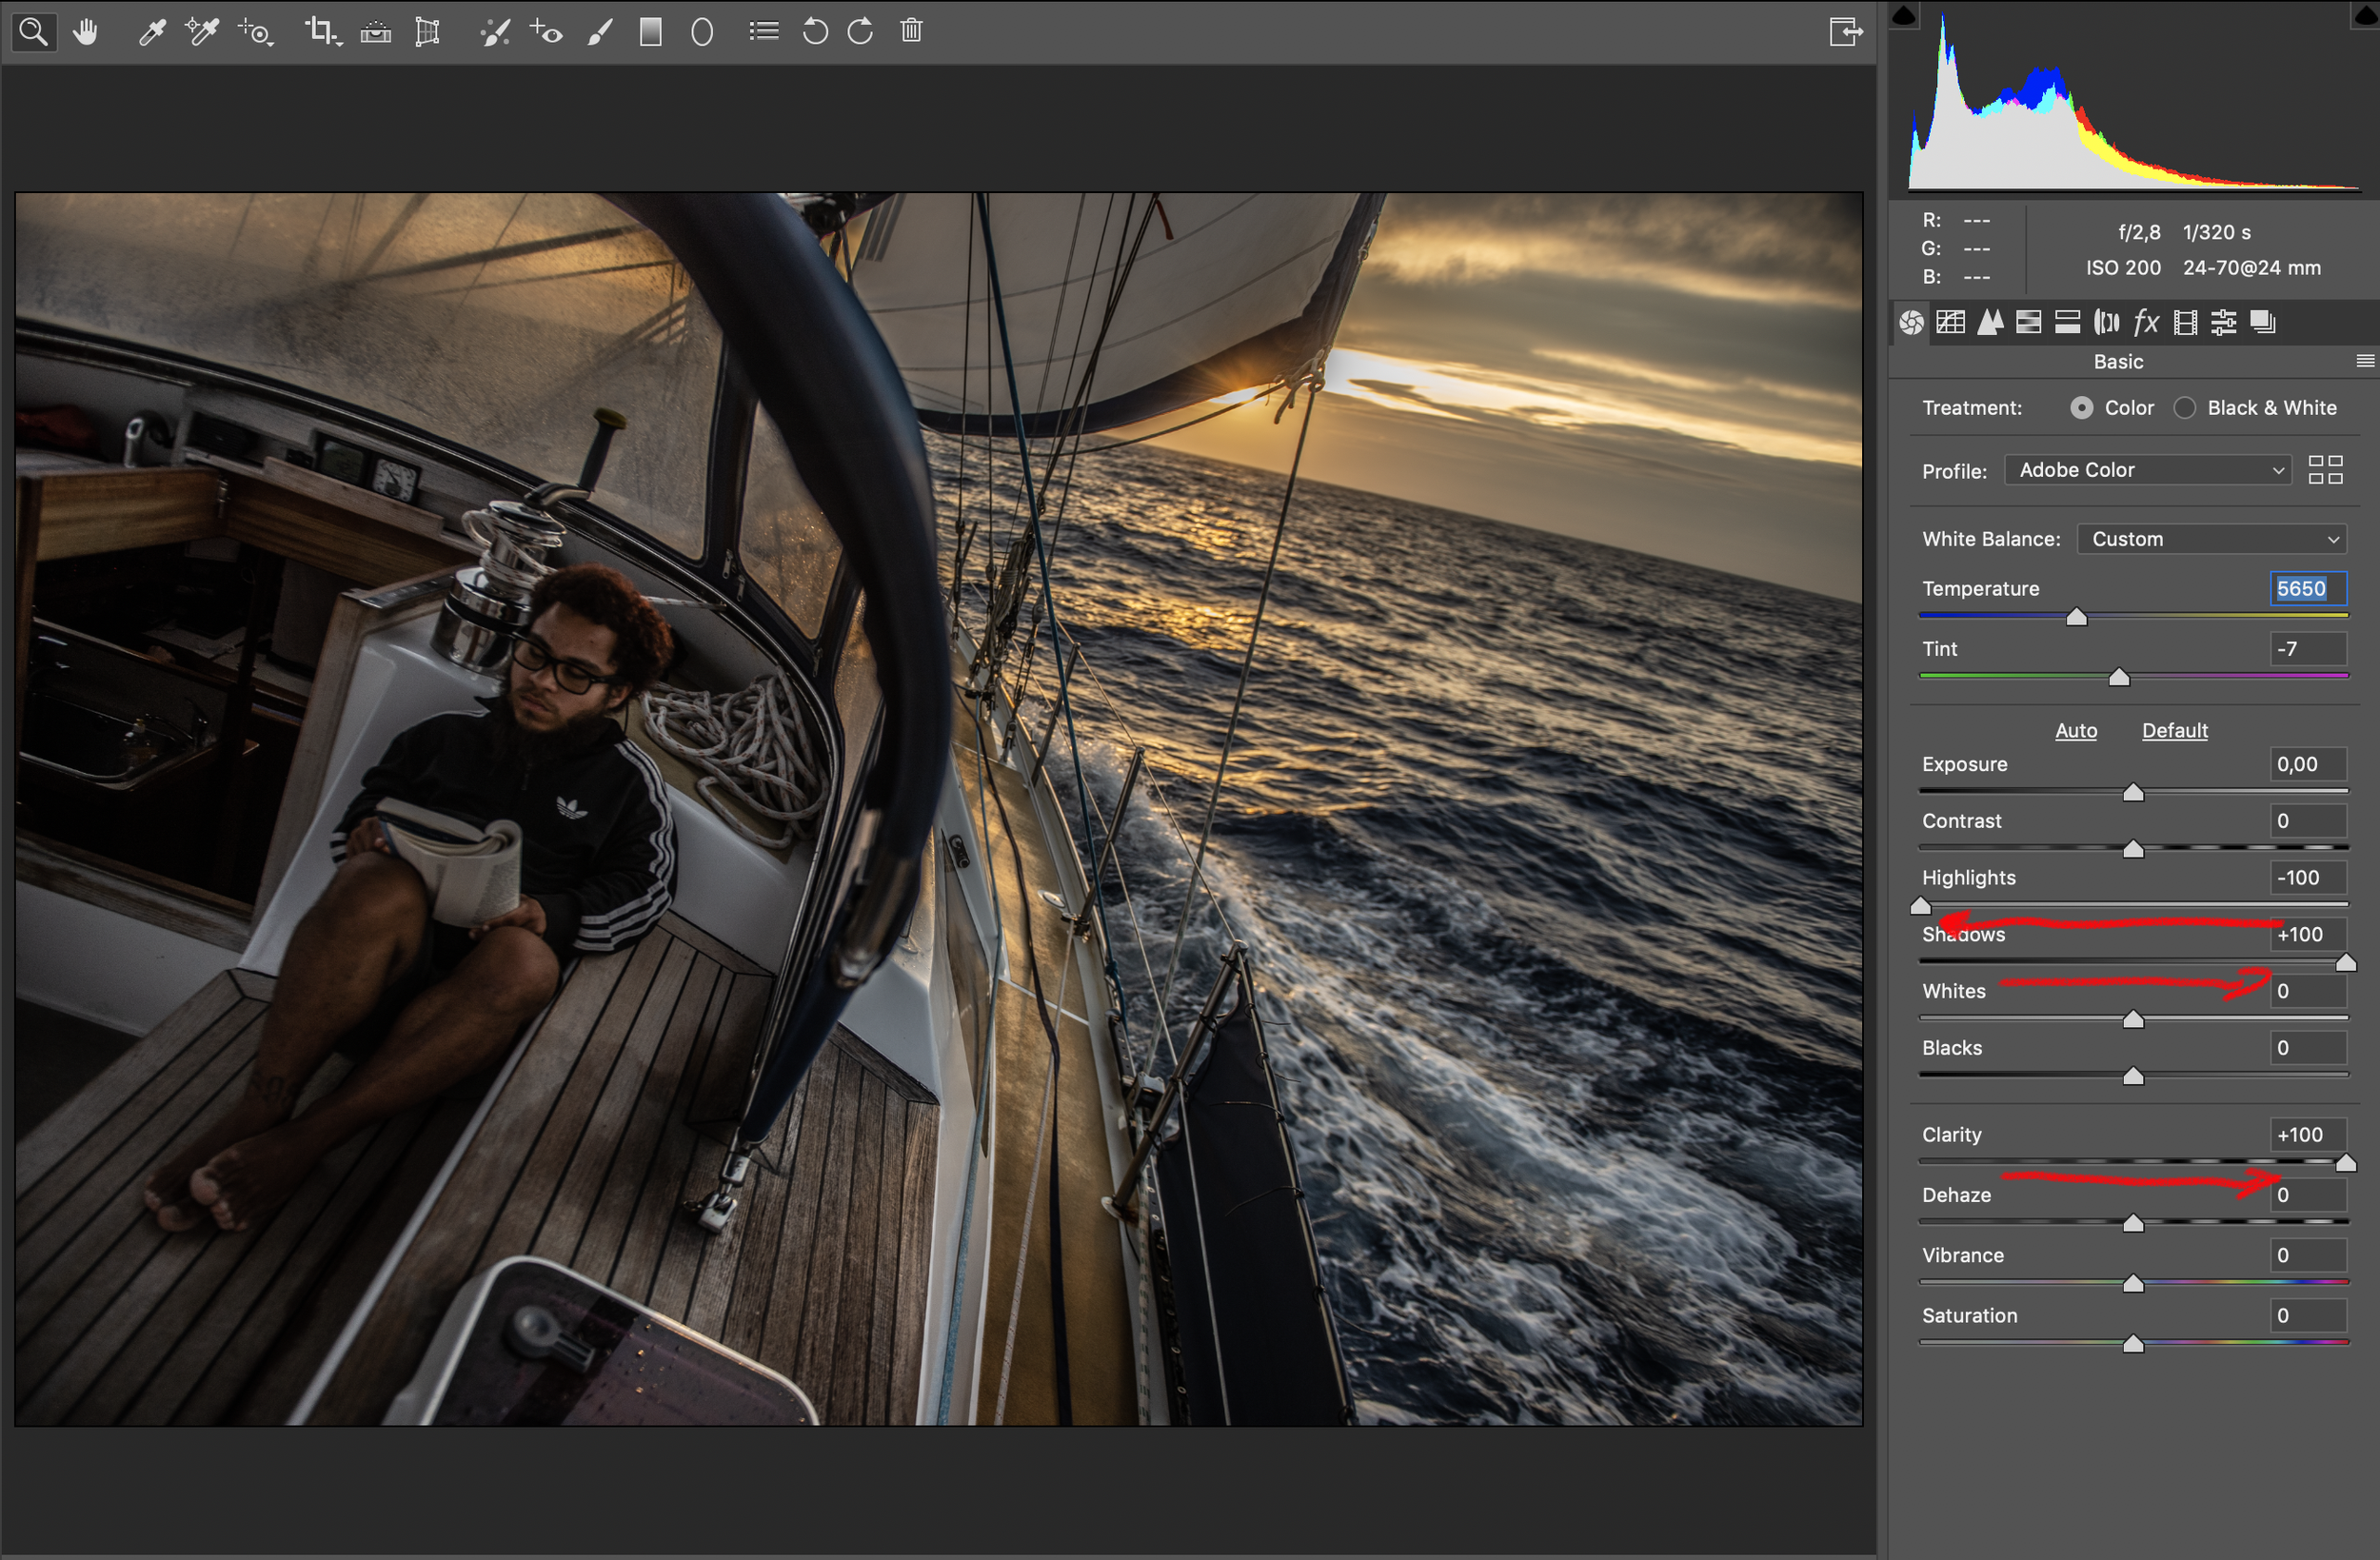
This is solely my method (not everyone is fan of maxing out clarity) but I like dynamic pictures, so I drop out highlights completely to remove glares and unveil light textures. Same I do with shadows to uncover darkest areas.
Without clarity, the picture would looked flat. So to fix it (no, no contrast), I use clarity to extract most details through mid-light manipulation. Pro photographers usually do 20%, but in my style I go for 80-100%. But that’s my canvas.
STEP 3
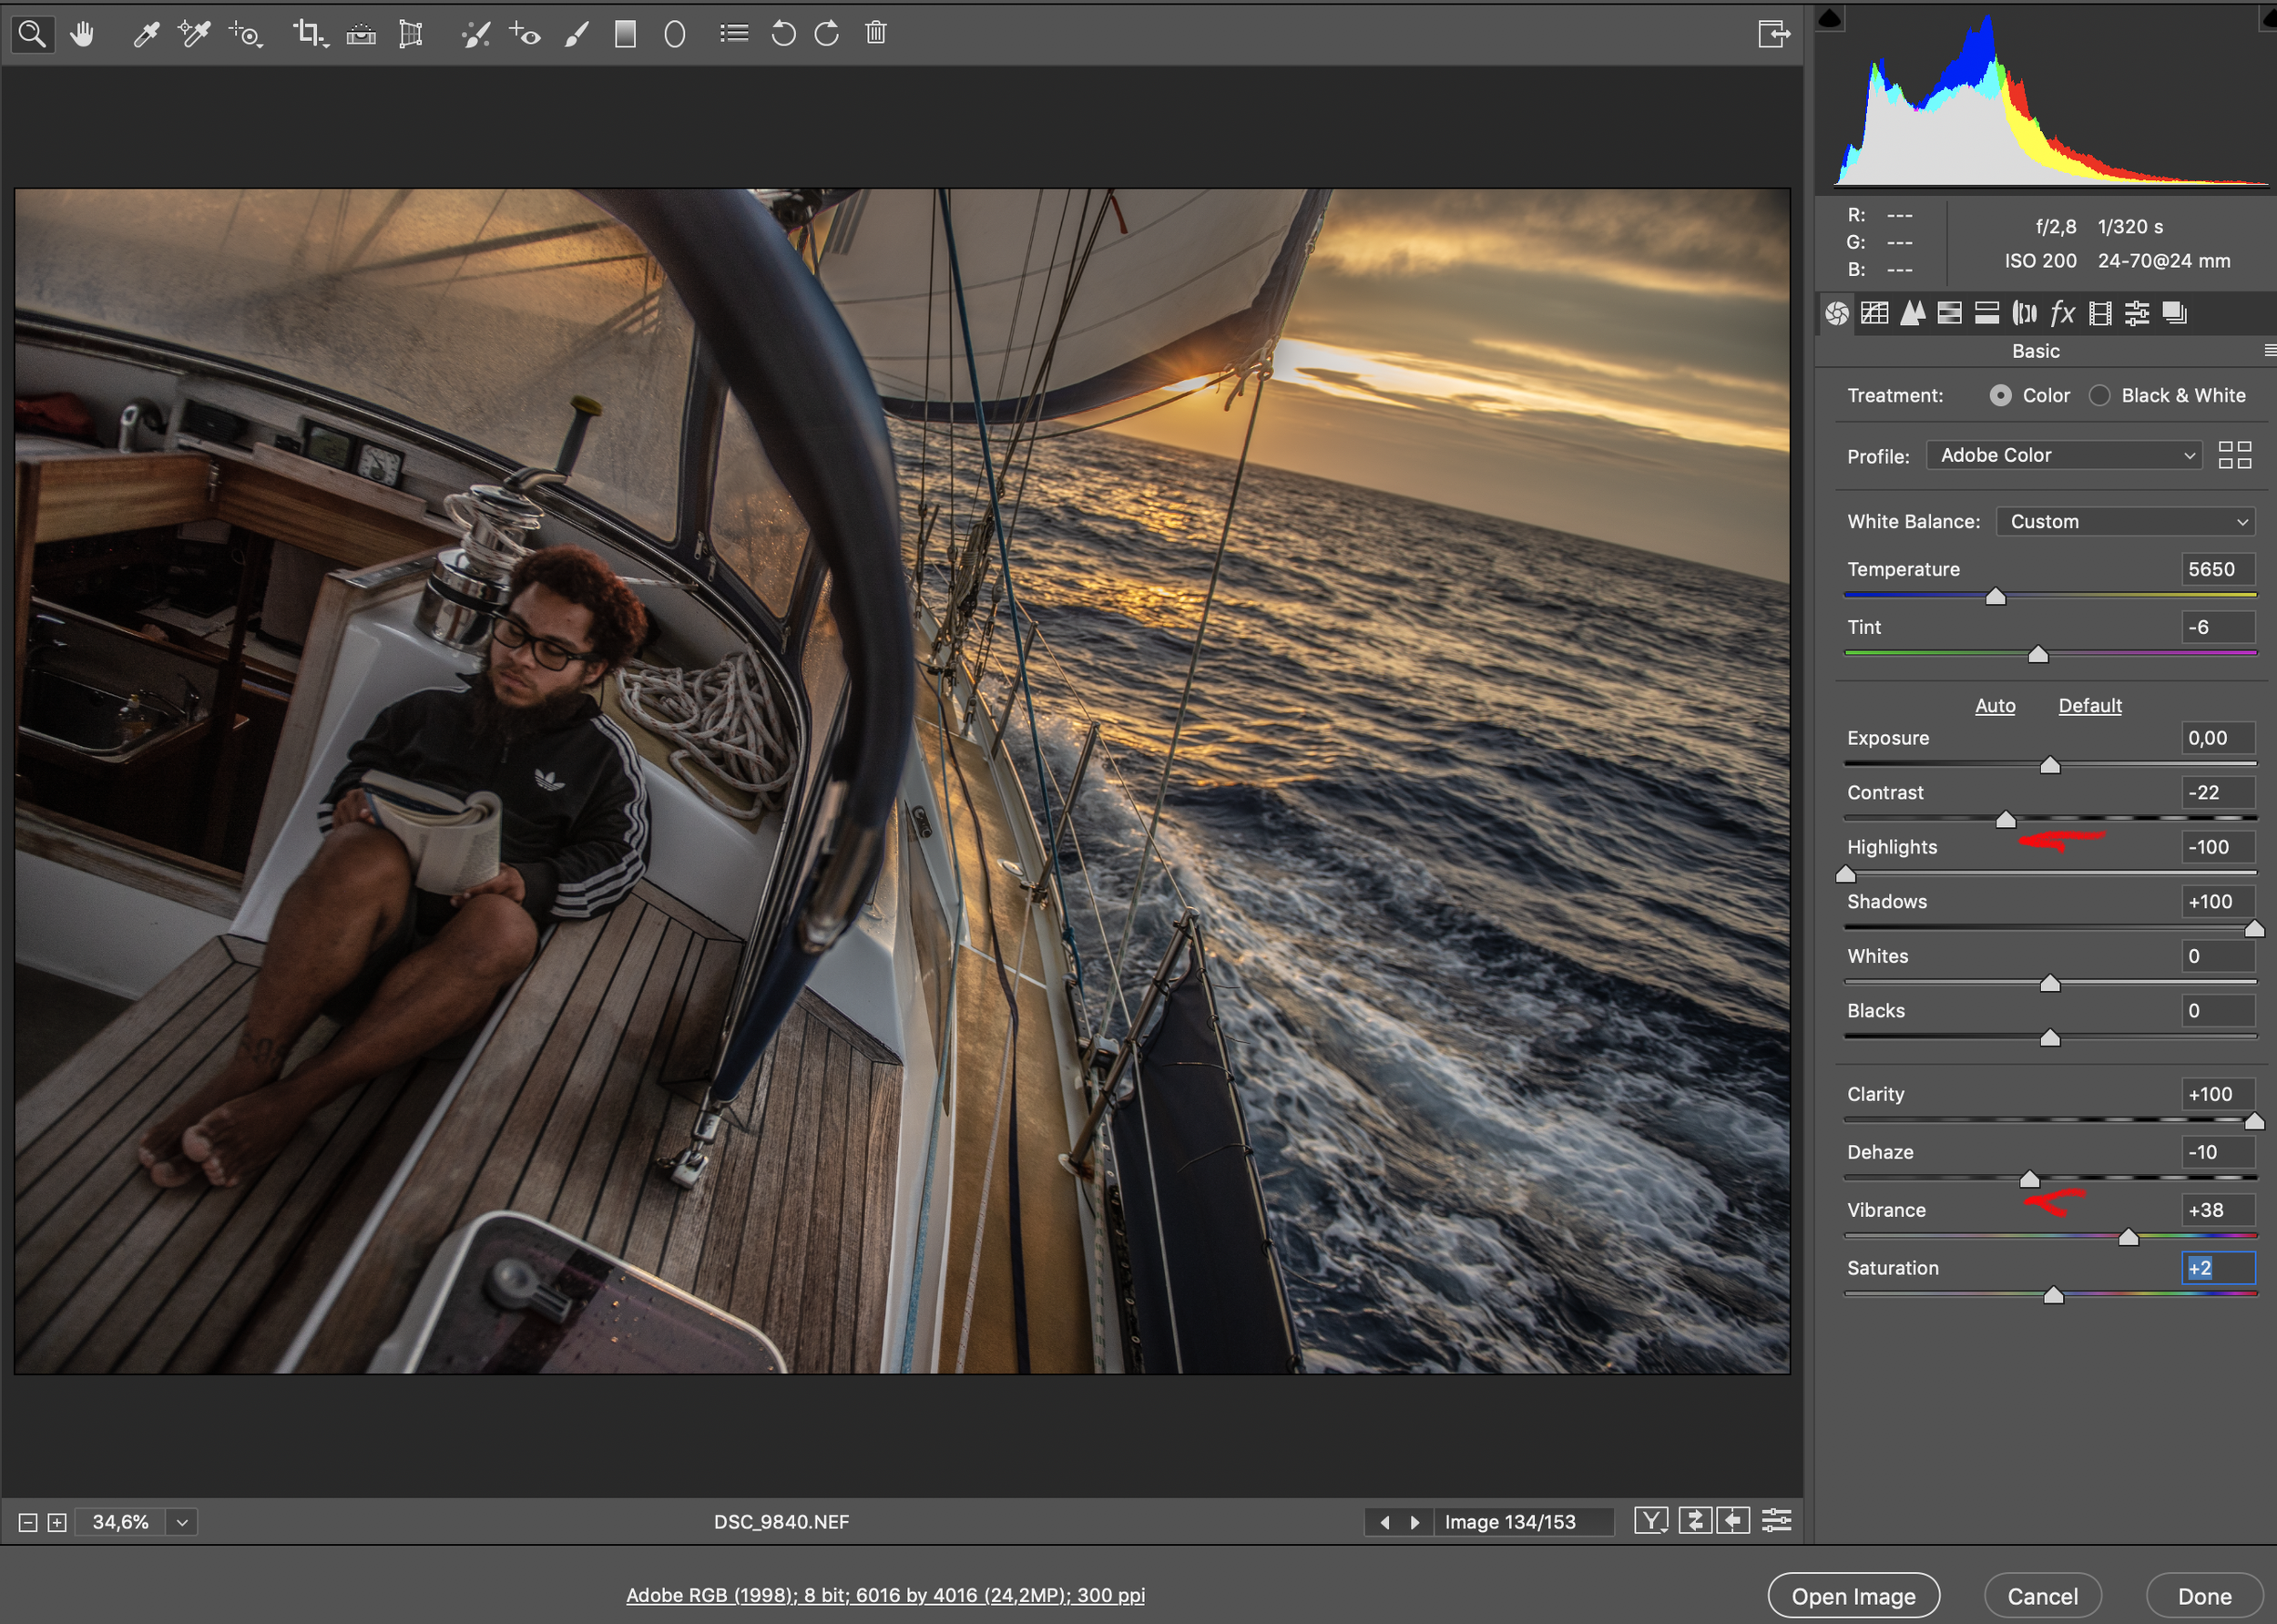
Now I’m here to work on the colors. I increased the vibrance (this focuses on light rather than saturation for all colors), but both vibrance and saturation are aggressive tools. I had to lower the contrast and dehaze to introduce a slight "greyness" to maintain a natural look while still keeping it lively.
STEP 4
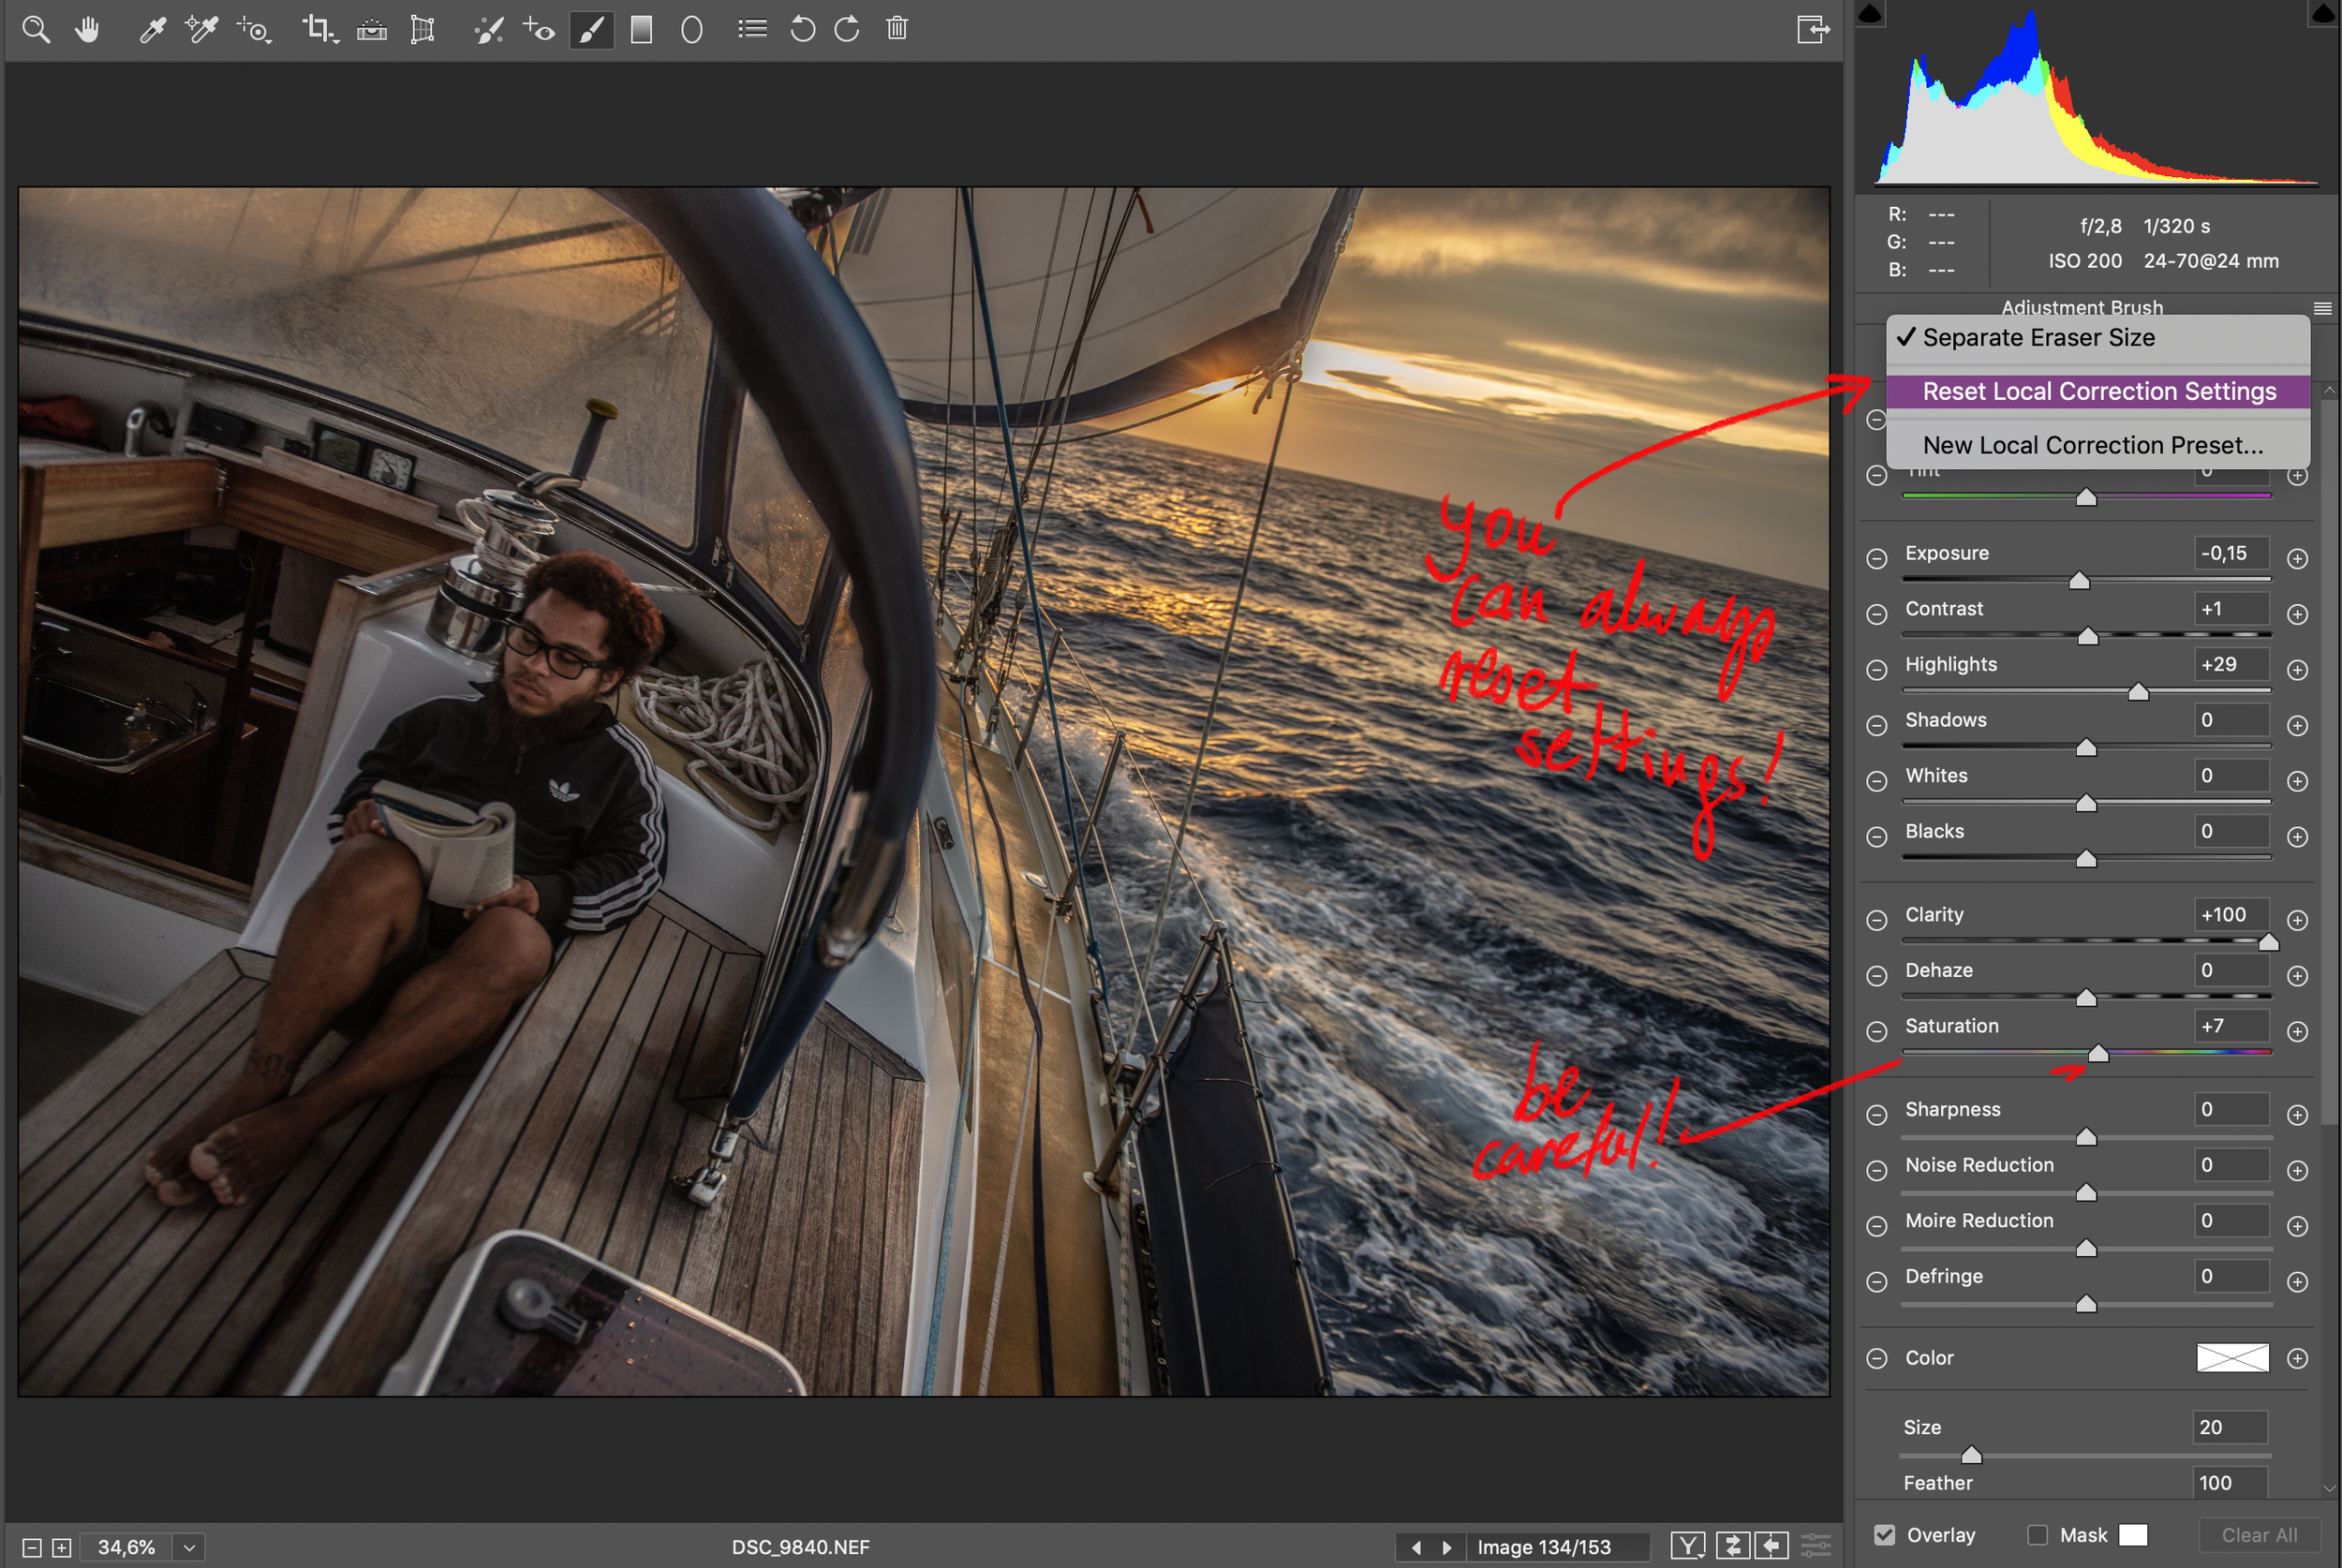
It’s not really STEP 4 yet, but more a reminder that you always can reset settings if you gone wrong way!
(and I secretly tweaked gently saturation… only 4% :) )

Now we are working on focus point.
Select the brush tool to mask the area where you would like to make individual adjustments to the focus point. I selected the crew member with a feathered edge around them and made some minor adjustments to help them stand out.
STEP 5
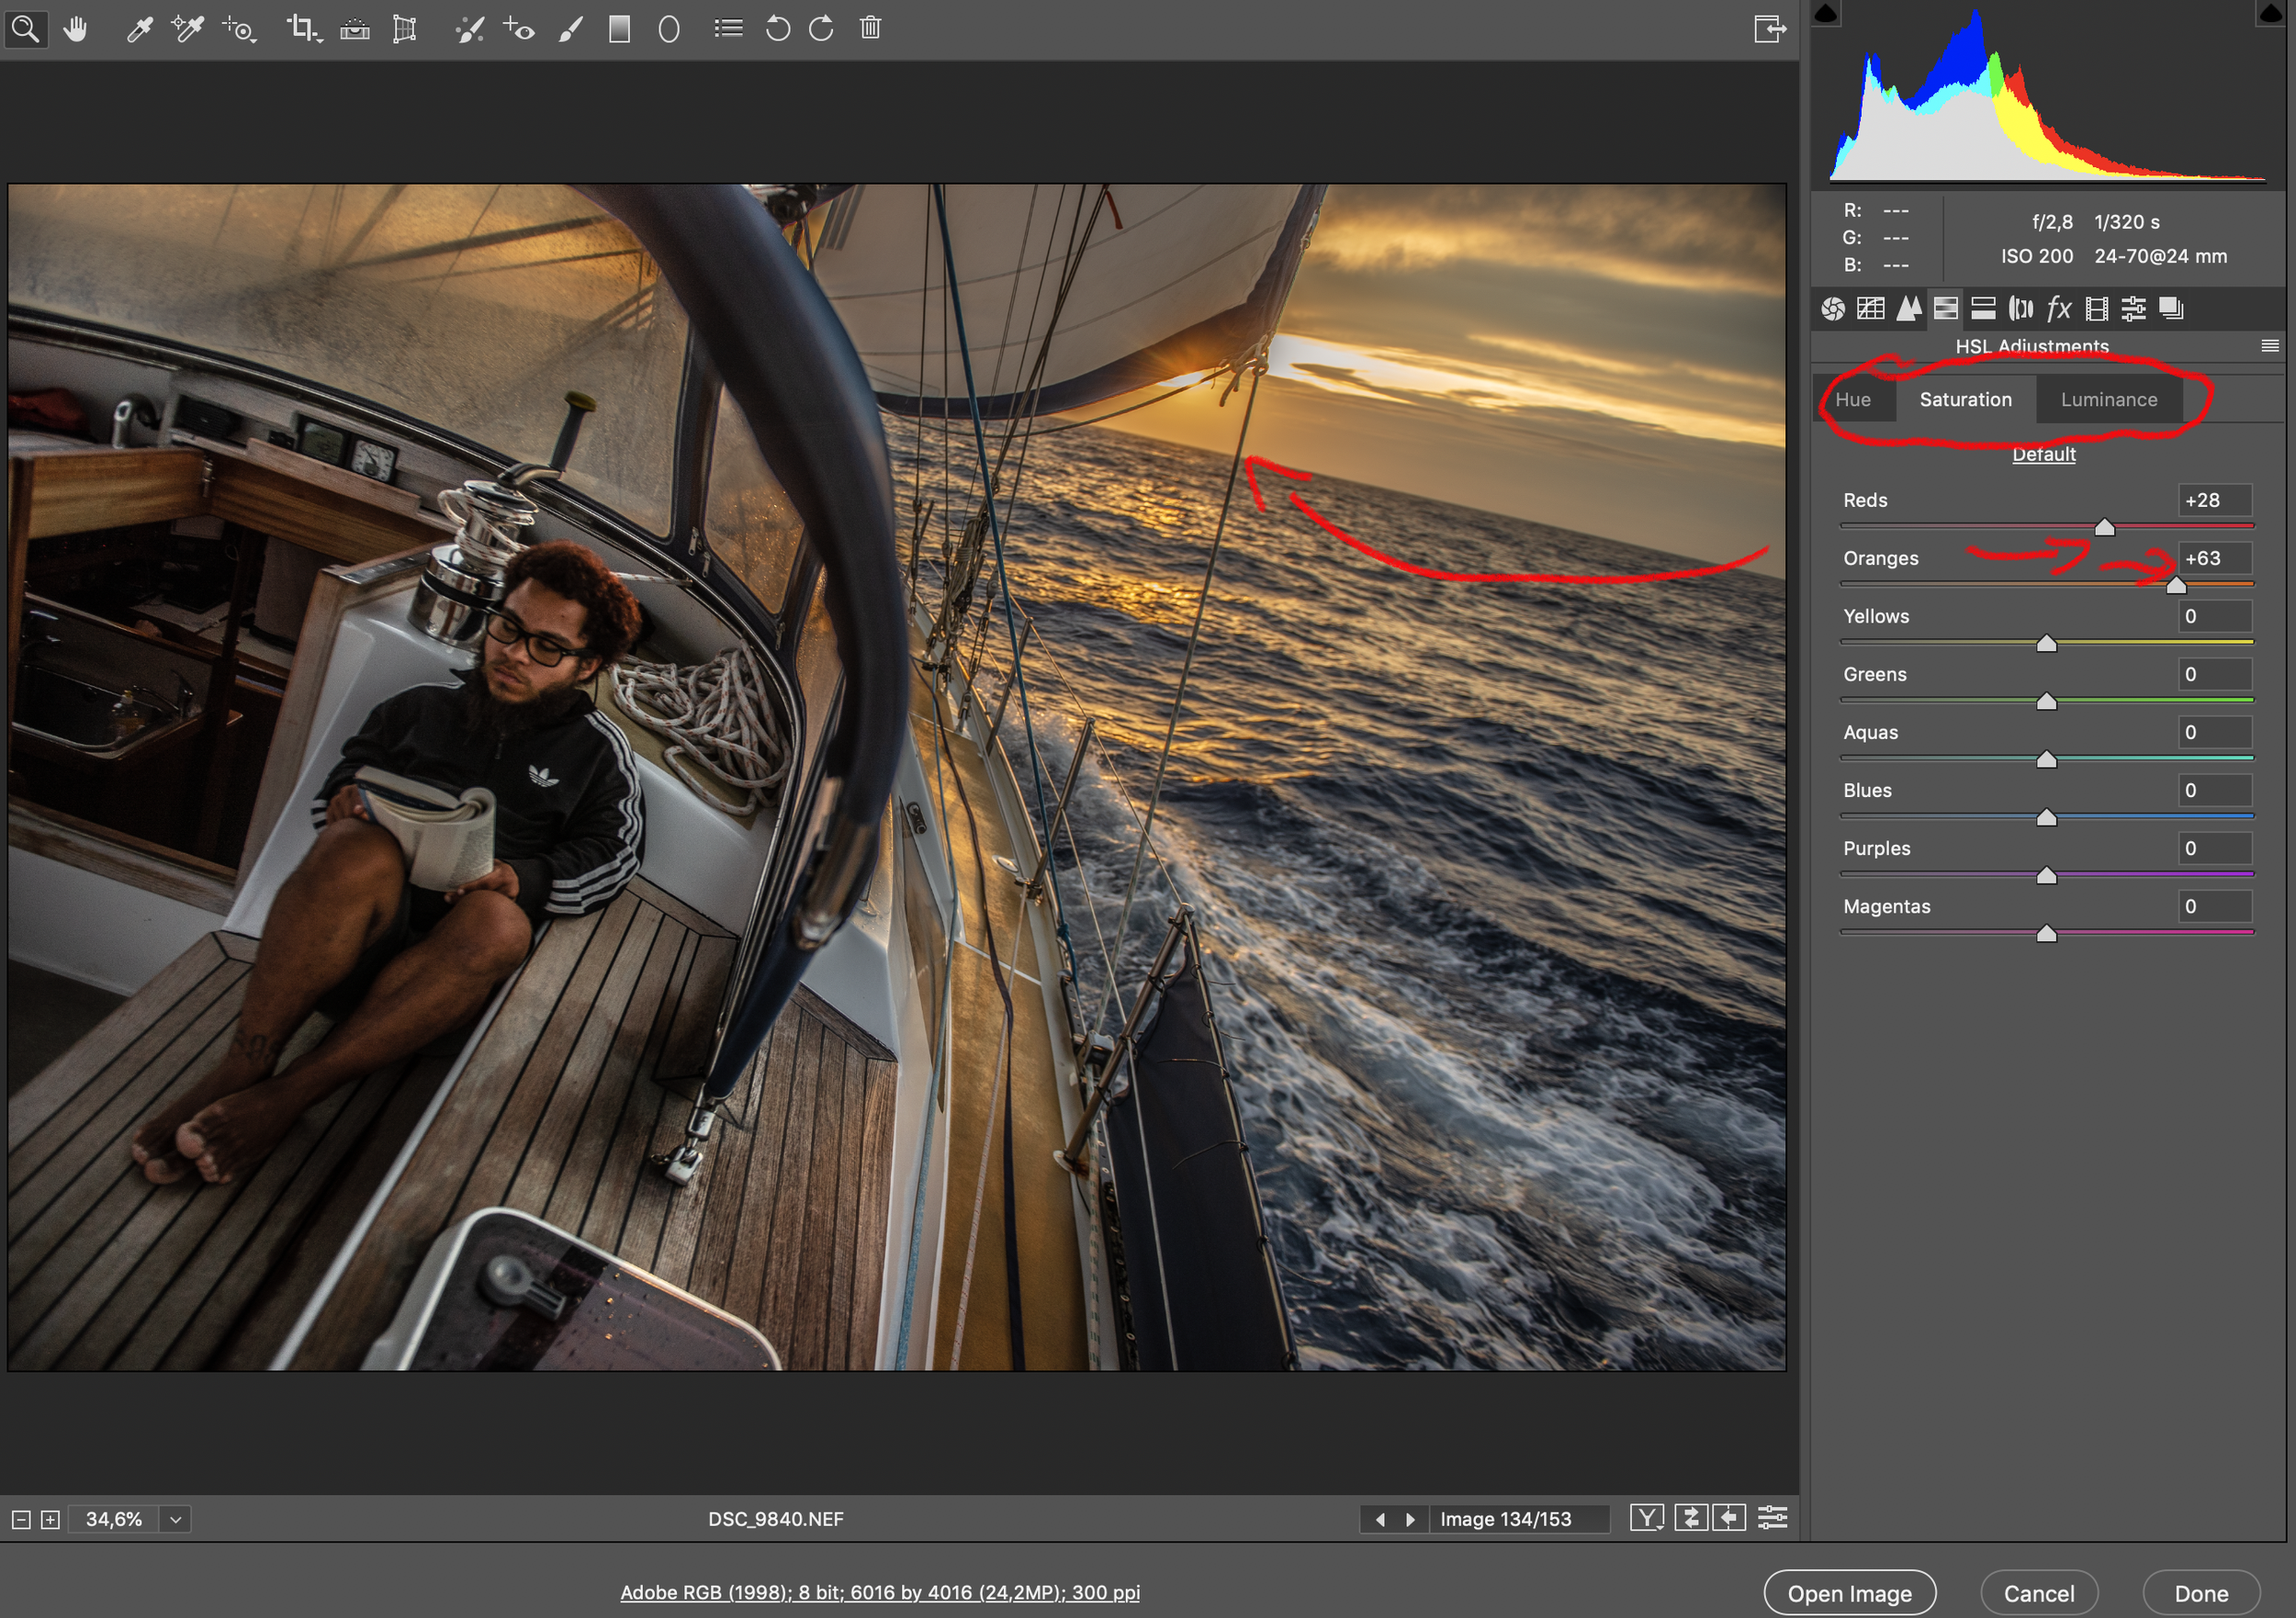
In this last step, I wanted to brighten up only selected colors.
My primary focus is the sunset, and I want it to burst with orange light. The HSL settings (Hue, Saturation, Luminance) are ultimate tools for manipulating colors.
Remember, too much adjustment will lead to unnatural pixelation, so always do so gently! I increased the saturation of the reds and oranges in the Saturation section, but in the Hue section, I shifted from the red hue to orange slightly to avoid giving the crew a red face. I also adjusted the Luminance to lighten up the orange colors.
That’s all you need to do as a basic adjustment without using Photoshop for further edits. Let me know if this mini tutorial has been helpful!